Attention: Here be dragons
This is the latest
(unstable) version of this documentation, which may document features
not available in or compatible with released stable versions of Godot.
Checking the stable version of the documentation...
Using SoftBody3D
柔体(或柔体动力学)模拟可变形物体的运动,改变形状和其他物理特性。例如,这可以用于模拟布料或创建更逼真的角色。
基本设置
SoftBody3D 节点用于柔性物体模拟。
我们将创建一个弹性立方体来演示柔体的设置。
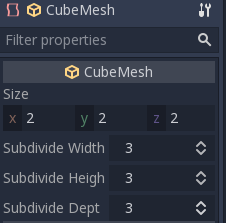
Create a new scene with a Node3D node as root. Then, create a SoftBody3D node. Add a CubeMesh in the mesh property of the node in the inspector and increase the subdivision of the mesh for simulation.
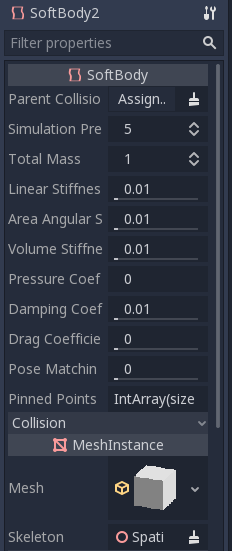
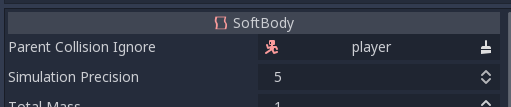
设置参数以获得你想要的柔体类型。尽量保持 Simulation Precision(模拟精度)的数值高于 5,否则该柔体结构可能会瓦解。
备注
小心处理一些参数,因为改动某些数值会导致奇怪的结果。例如,如果形状未完全封闭并且你将压力设置为大于 0,则柔体将如同在强风下的塑料袋一样飞舞。
播放该场景以查看模拟结果。
小技巧
要改善模拟结果,可以增大 Simulation Precision,但同时会大幅度增加性能成本。
斗篷模拟
我们将在 Platformer3D 演示中制作一个斗篷。
Open the Player scene, add a SoftBody3D node and assign a PlaneMesh to it.
Open the PlaneMesh properties and set the size(x: 0.5 y: 1) then set Subdivide Width and Subdivide Depth to 5. Adjust the SoftBody3D's position. You should end up with something like this:
小技巧
细分会生成更细密的网格,以便更好地进行模拟。
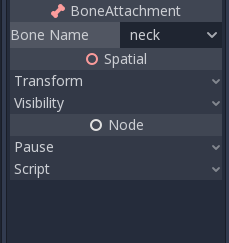
在骨架节点下添加 BoneAttachment3D 节点,然后选择 Neck(颈部)骨骼,将斗篷附加到角色骨架。
备注
BoneAttachment3D 节点用于将对象附加到骨架的骨骼上。附加的对象将跟随骨骼移动,角色的武器可以通过这种方式附加。
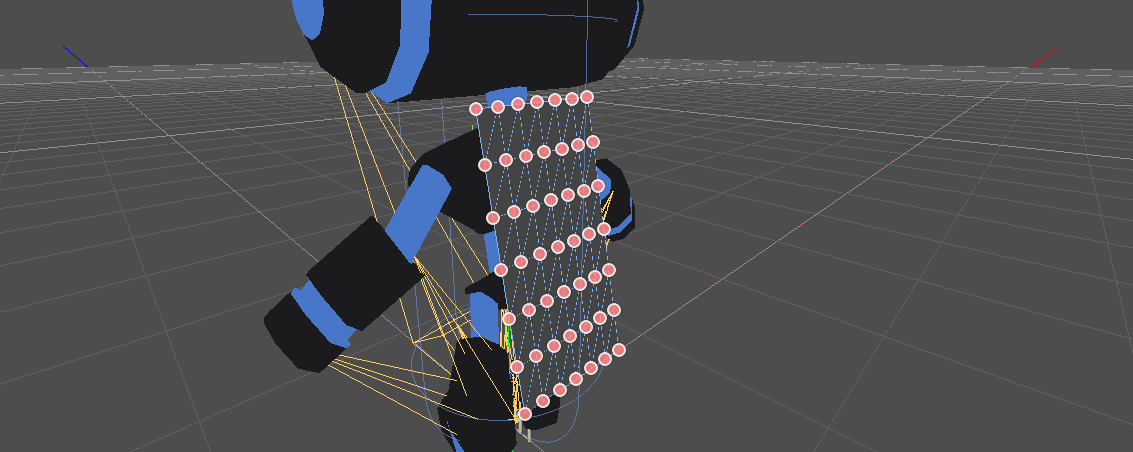
To create pinned joints, select the upper vertices in the SoftBody3D node:
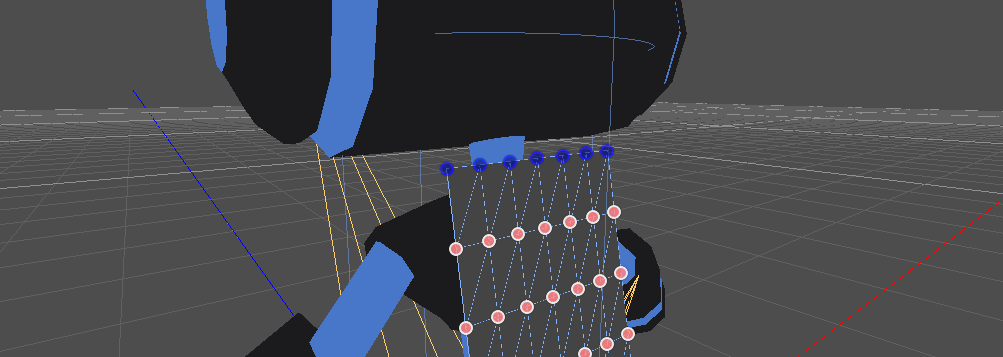
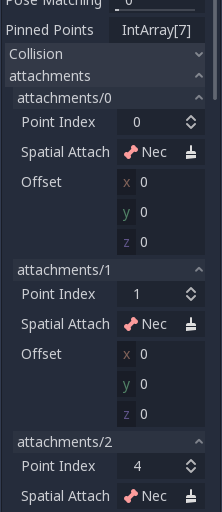
The pinned joints can be found in SoftBody3D's Attachments property, choose the BoneAttachment as the SpatialAttachment for each pinned joints, the pinned joints are now attached to the neck.
Last step is to avoid clipping by adding the Kinematic Body Player to Parent Collision Ignore of the SoftBody3D.
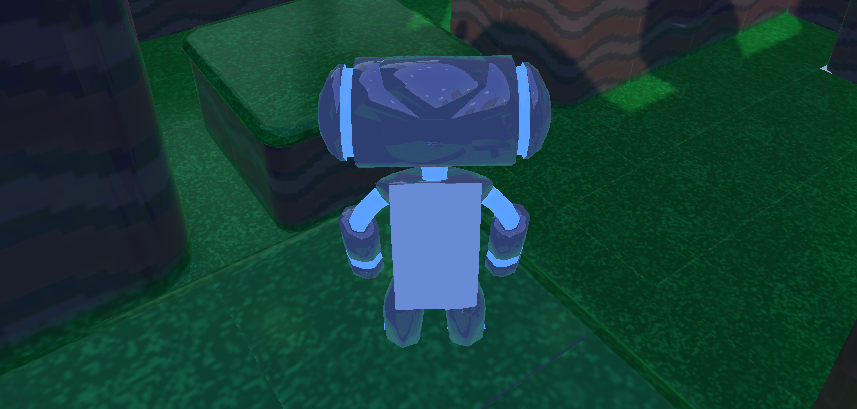
播放场景,应该已经正确模拟了斗篷。
这涵盖了柔体的基本设置,当你制作游戏时,尝试这些参数来达到你想要的效果。
Using Imported Meshes
The Save to File option in the Advanced Import Settings dialog allows you
to save a mesh to a standalone resource file that you can then attach to
SoftBody3D nodes.
You may also want to disable LOD generation or change the LOD generation options
when importing a mesh for use with SoftBody3D. The default import settings
will produce an LOD that merges adjacent faces that are nearly flat with
respect to each other, even at very close render distances. This works well for
static meshes, but is often undesirable for use with SoftBody3D if you want
these faces to be able to bend and move with respect to each other, instead of
being rendered as a single plane.
See 导入配置 and 网格的细节级别(LOD) for more details.